


Introduction
Rocker switches are ubiquitous in various applications due to their simplicity, durability, and ease of use. Mastering the wiring of these switches can significantly enhance their functionality in diverse settings, including automotive, industrial, and home automation systems. This guide aims to provide a comprehensive understanding of rocker switch wiring, focusing on key concepts, types of rocker switches, wiring techniques, and practical applications.
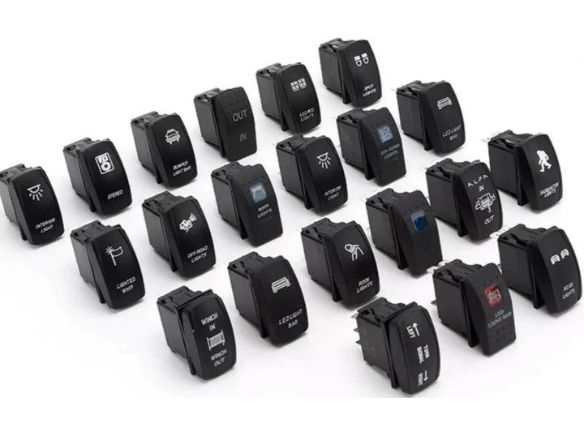
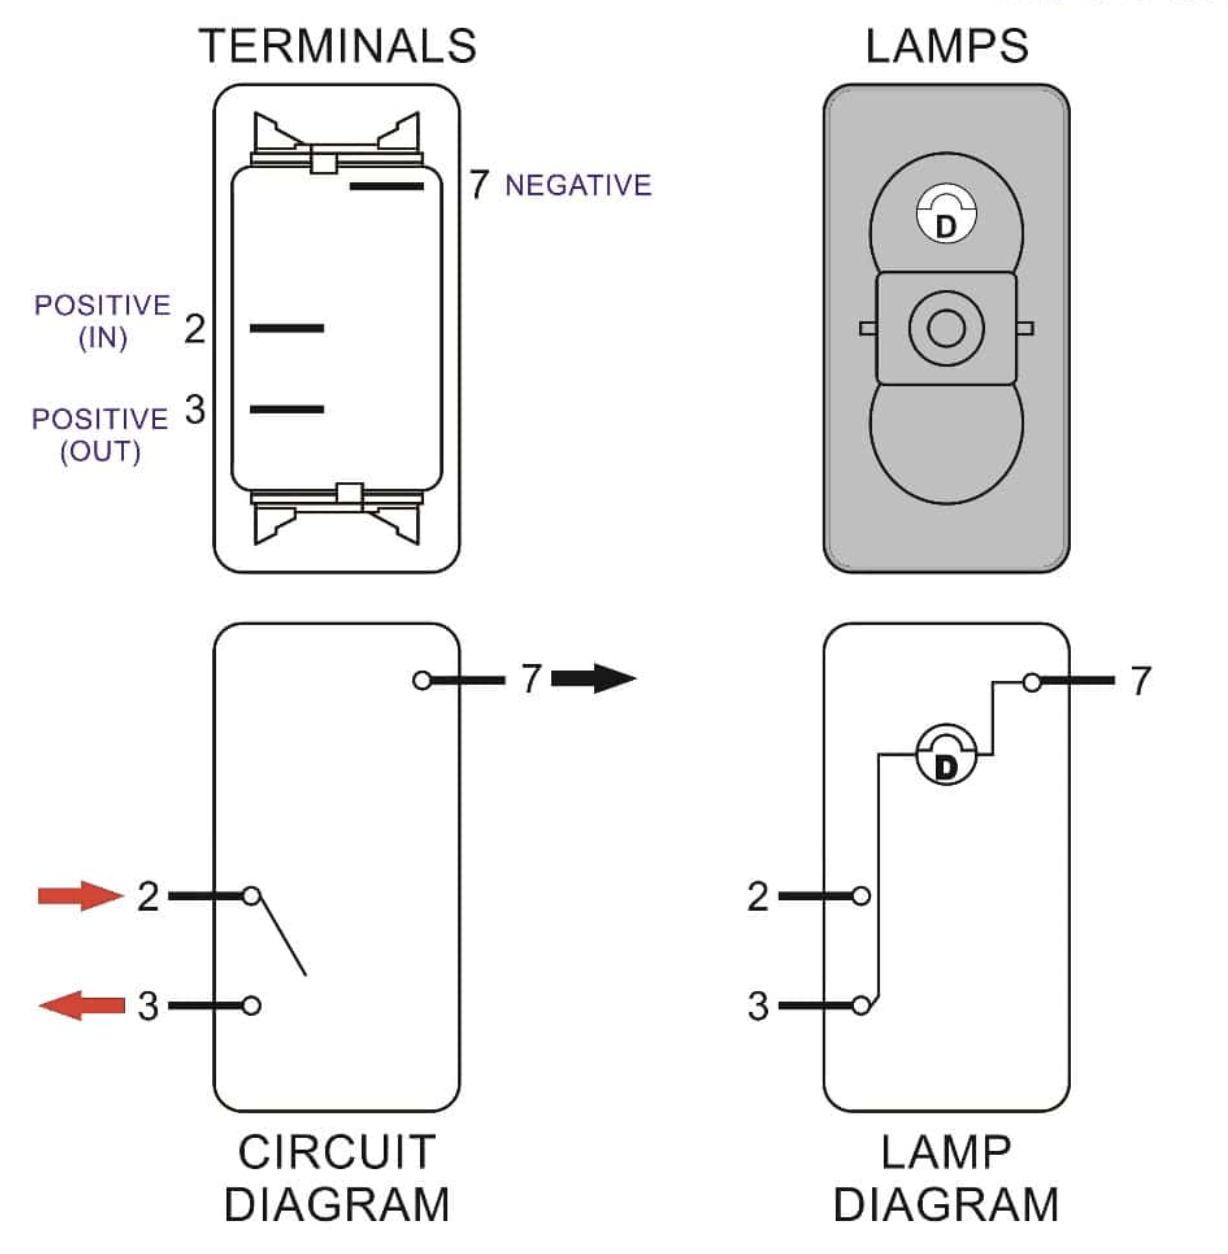
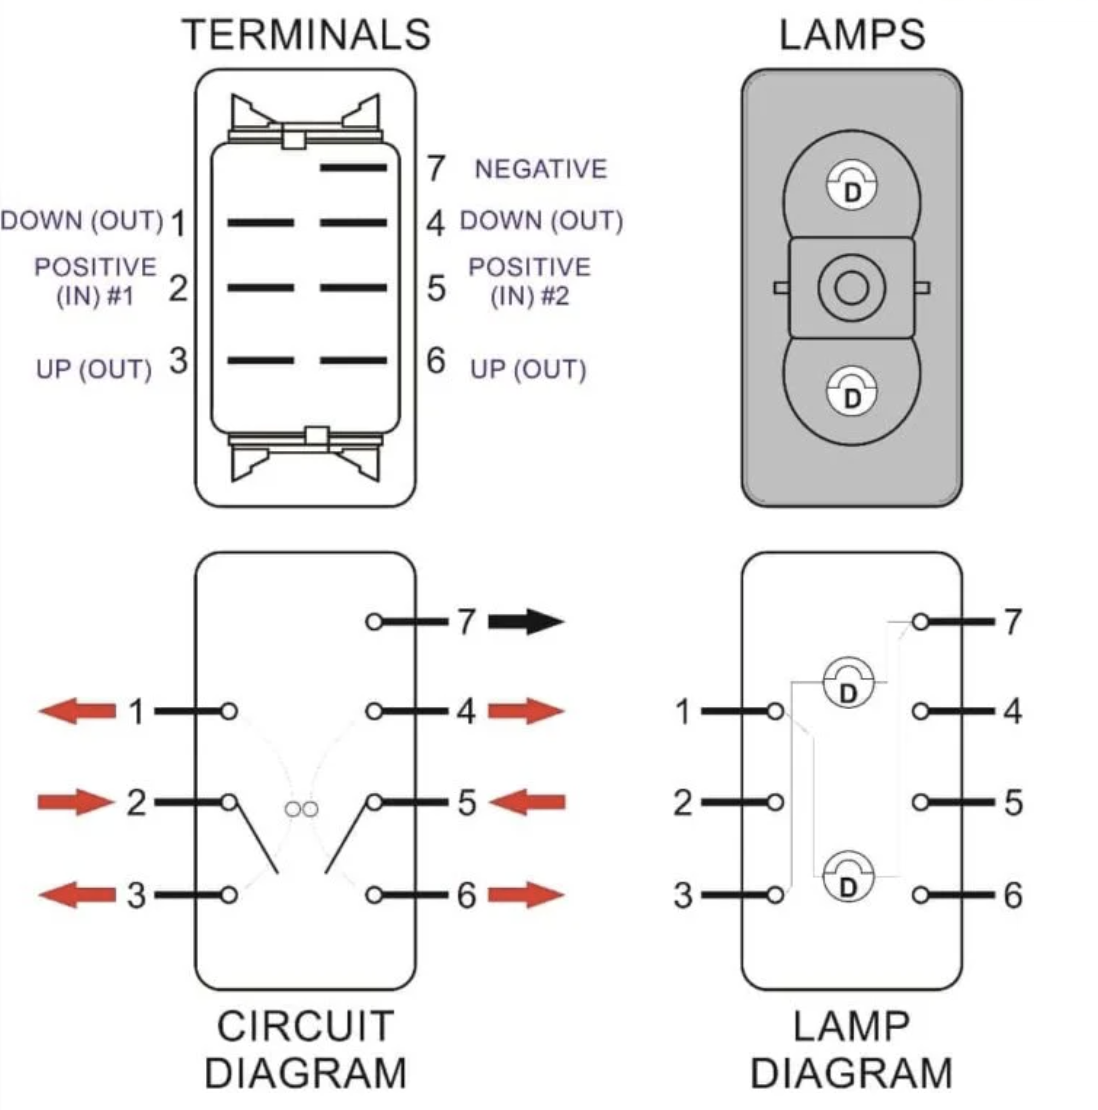
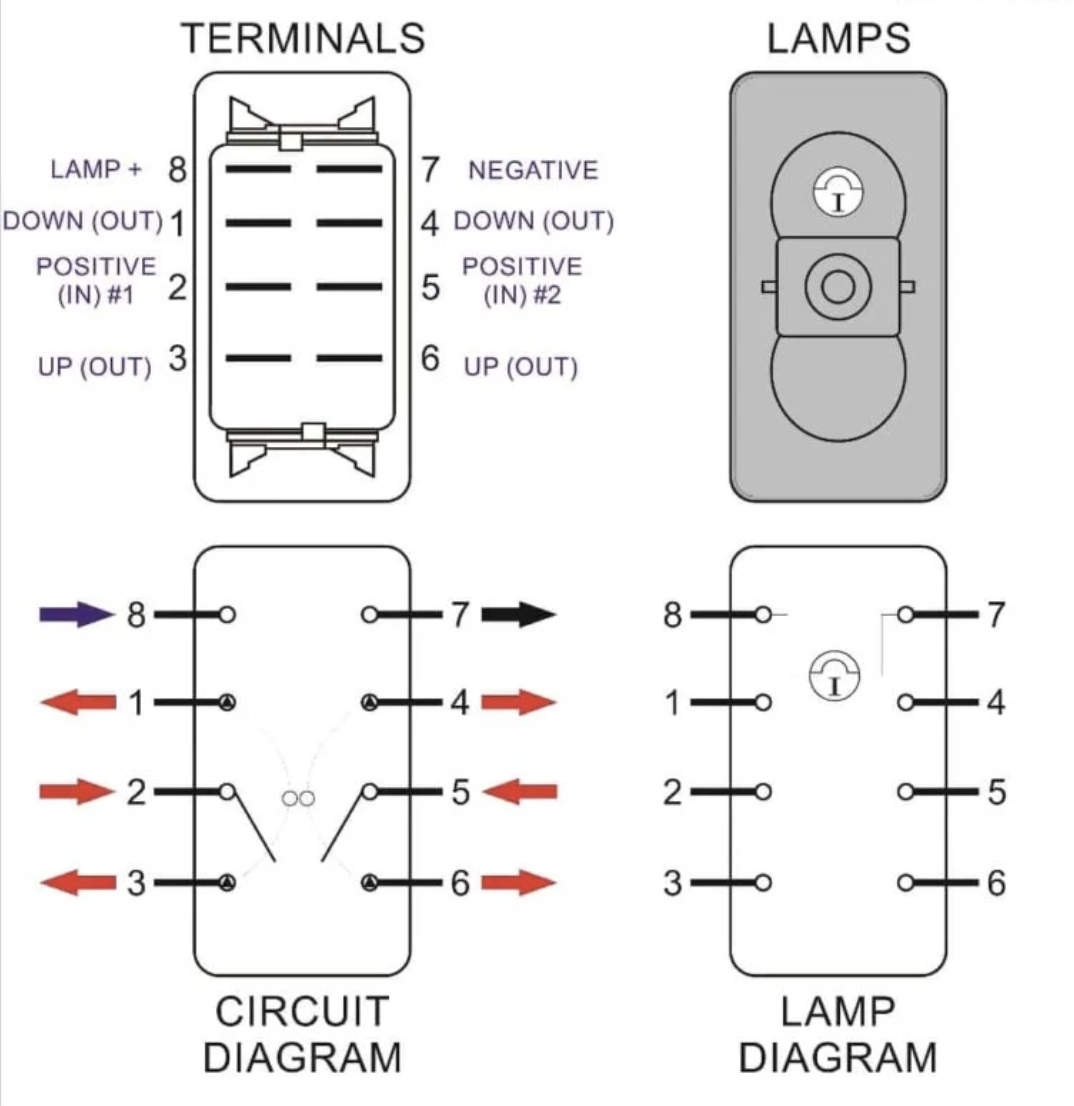
Understanding Rocker Switches
Types of Rocker Switches
- Single-Pole Single-Throw (SPST) Rocker Switch: This is the simplest type, used to control a single circuit.
- Single-Pole Double-Throw (SPDT) Rocker Switch: Can connect a common terminal to one of two other terminals, allowing for more complex switching.
- Double-Pole Single-Throw (DPST) Rocker Switch: Controls two circuits simultaneously.
- Double-Pole Double-Throw (DPDT) Rocker Switch: Can control four different circuits, offering the most versatility.
Key Components
- Actuator: The part of the switch that is pressed to open or close the circuit.
- Contacts: The conductive parts that make or break the connection.
- Terminals: Points where the switch is connected to the circuit.
Basic Wiring Techniques
Tools and Materials Needed
- Rocker switch
- Wire strippers
- Screwdriver
- Soldering iron and solder (optional)
- Electrical tape or heat shrink tubing
Step-by-Step Wiring Process
- Identify the Terminals: Typically, terminals are marked as “Power,” “Accessory,” and “Ground.”
- Prepare the Wires: Strip the insulation off the ends of the wires to expose the conductors.
- Connect the Power Wire: Attach the power wire from the power source to the power terminal of the switch.
- Connect the Load Wire: Attach the load wire, leading to the device you want to control, to the accessory terminal.
- Ground the Switch: Connect a wire from the ground terminal to a suitable ground point.
- Secure Connections: Use a screwdriver to tighten the terminal screws or solder the wires for a more secure connection.
- Insulate Connections: Wrap the terminals with electrical tape or use heat shrink tubing to prevent short circuits.
Advanced Wiring Configurations
Using SPDT Rocker Switches
- ON-ON Configuration: Connect the common terminal to the power source and the other two terminals to different loads.
- ON-OFF-ON Configuration: Similar to ON-ON but with a middle position that disconnects both loads.
Wiring Multiple Switches
- Parallel Wiring: Multiple switches control the same device.
- Series Wiring: Switches are connected in series to control the same device, adding more control points.


Practical Applications
Automotive Applications
- Headlights and Fog Lights: SPST rocker switches are often used to control headlights or fog lights in vehicles.
- Interior Lighting: DPDT rocker switches can be used to control multiple lighting circuits within a vehicle.
Home Automation
- Lighting Control: Rocker switches can be integrated with home automation systems to control lights.
- Appliance Control: Use rocker switches to control appliances like fans, heaters, and more.
Industrial Applications
- Machinery Control: Rocker switches are used to start or stop industrial machines.
- Conveyor Belts: DPST or DPDT switches can control complex machinery like conveyor belts.
Safety Tips
- Always ensure the power is turned off before starting any wiring work.
- Use insulated tools to avoid accidental electric shocks.
- Double-check all connections to ensure they are secure and correctly wired.
- Consult the switch’s datasheet for specific wiring diagrams and ratings.
Conclusion
Mastering rocker switch wiring involves understanding the types of switches, the basic and advanced wiring techniques, and their practical applications. With this knowledge, you can effectively use rocker switches in various settings, enhancing the functionality and safety of your electrical projects.